
One of the requirements for overseas-trained teachers who wish to teach in New Zealand is demonstrating English language competency. The Teaching Council of Aotearoa New Zealand introduced this requirement to ensure teachers can effectively teach, communicate, and support learning in New Zealand schools, regardless of whether English is their first language. While English has always been the medium of instruction in my teaching profession, I still needed to provide formal evidence of my proficiency.
Available Options to Prove English Proficiency
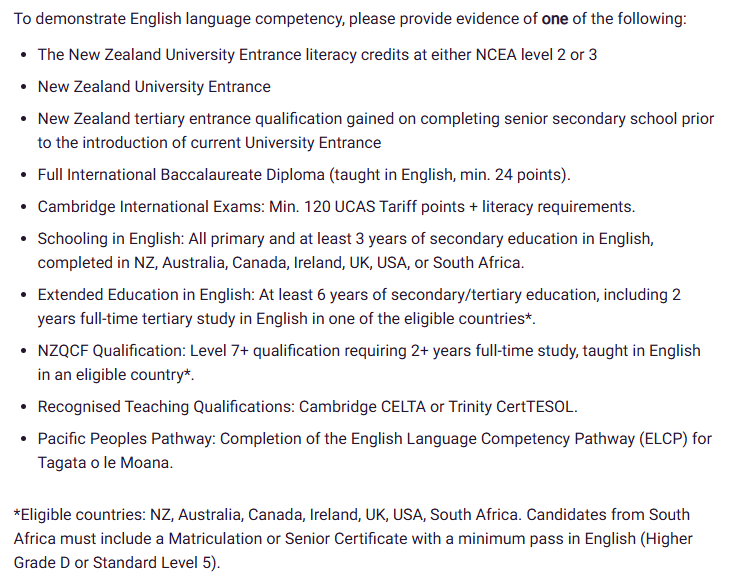
The Teaching Council provides several pathways for applicants to demonstrate English language competency. Depending on your educational background, you may be able to demonstrate proficiency through previous schooling or qualifications obtained in English-speaking countries, or recognized teaching qualifications and pathways. The options are as follows:
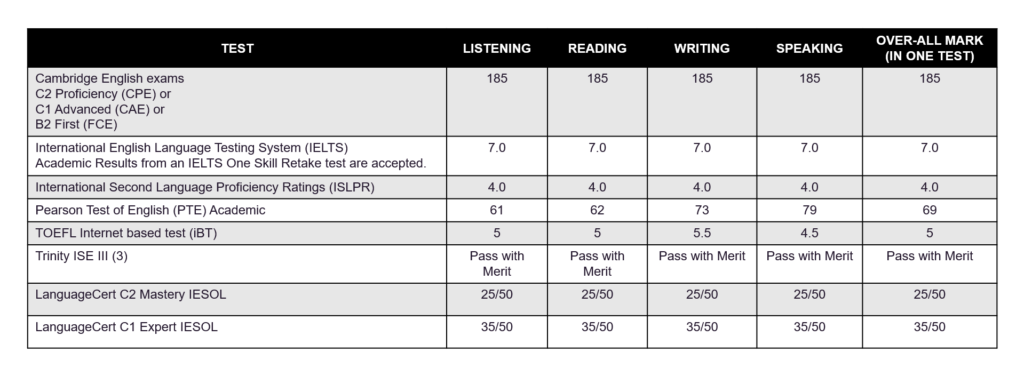
For many overseas-trained teachers like me who completed their education outside the eligible countries, taking an approved English language test is often the most straightforward option. Here are the accepted tests and the minimum scores required.
Why I Chose PTE Academic
After researching my options, I decided to take the Pearson Test of English (PTE) Academic. The PTE Academic appealed to me because it is fully computer-based and is recognized by New Zealand authorities. I also came across several posts from online communities (such as Facebook and Reddit) attesting that PTE scoring system is more favorable and generous than IELTS. The PTE Academic exam assesses four key communication skills:
- Speaking
- Writing
- Reading
- Listening
Registering for the Exam
My first step was to create an account on the Pearson PTE website and book a test schedule at a nearby testing center. The registration process was straightforward:
- Create an online account. Visit pearsonpte.com and sign up for a PTE account. You will need this account to book your exam, manage your appointment, and access your results. (You can watch the video below for a detailed step-by-step guide on how I registered for the PTE Academic and booked my exam.)
- Select a testing location. Once you have successfully registered, you will be asked which country you intend to use the exam for and the purpose of taking it. To find a testing center, enter your preferred location and browse the available test centers near you.
- Choose your preferred schedule. Check the available schedules at your chosen testing center, as testing dates may vary by location. Select a date that gives you enough time to prepare while also considering how soon you’ll need your results.
- Pay the examination fee. At the time I booked my exam, the fee was $250, which converted to approximately ₱14,038. Payment can be made using a credit card or Google Pay. Thankfully, I had a credit card and was able to convert the charge into installments, making the cost more manageable.
- Receive confirmation via email. Once your payment has been successfully processed, Pearson will send a confirmation email containing your test details, including the date, time, and location of your exam.
Since I wasn’t in a hurry, I scheduled my exam about a month later to give myself ample time to prepare. Once my test date was confirmed, the countdown officially began.
My Self-Review Journey
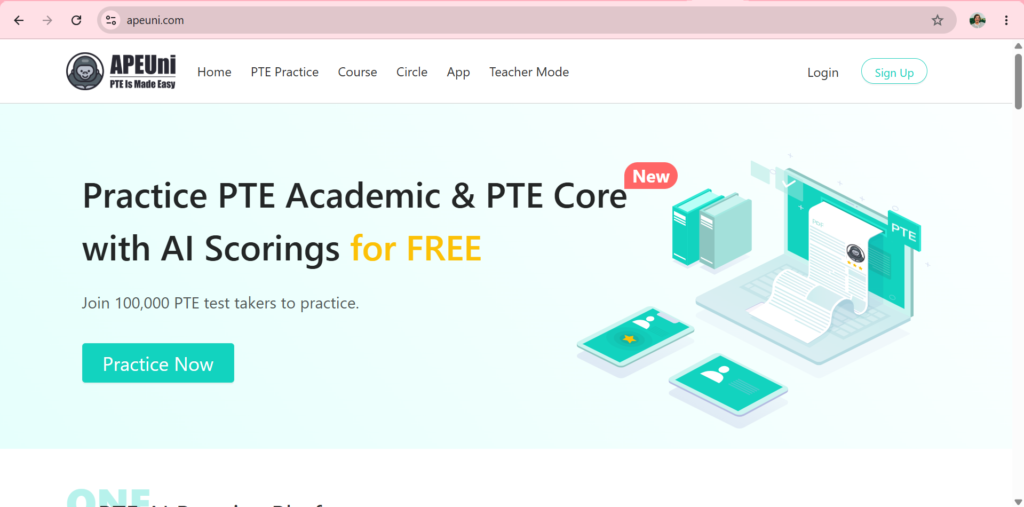
I decided not to enroll in a review center and do a self-review instead prepared for the exam on my own. Part of me wanted to see whether I could pass through self-study alone. To support my review, I installed ApeUni on my phone and subscribed to its VIP plan for one month, which cost ₱899. While ApeUni offers free access to a large question bank and limited practice features, the VIP subscription gave me access to scored mock tests and detailed AI-generated evaluations that helped me identify areas for improvement.
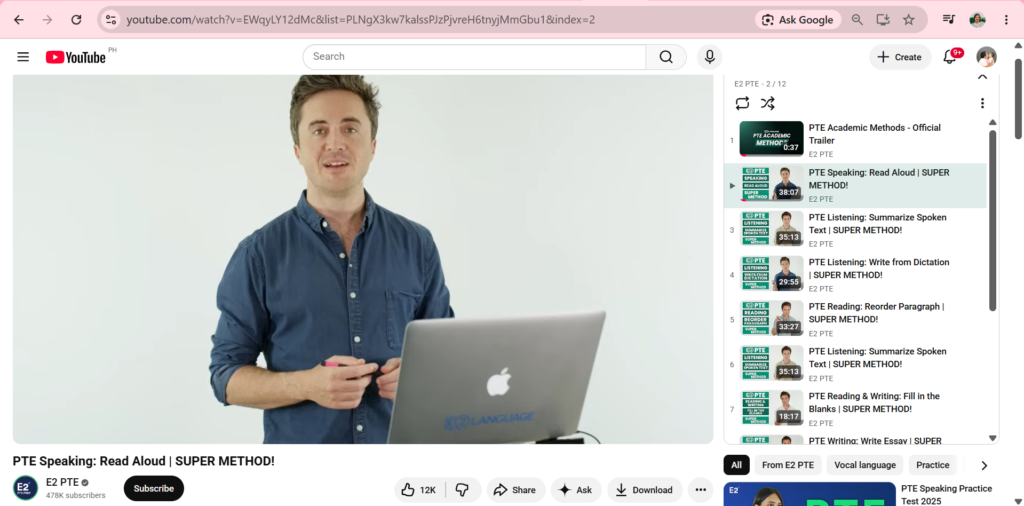
In addition to using ApeUni, I watched YouTube videos from channels such as E2 PTE, which provided valuable tips, strategies, and insights into the exam. I spent time familiarizing myself with the test format and understanding how each task was assessed.
Throughout my preparation, I focused on three key areas:
- Understanding the Exam Structure. Many test takers are already proficient in English but lose points because they are unfamiliar with the format. I made it a priority to understand each section and the strategies needed to answer efficiently.
- Practicing Consistently. Rather than studying for long hours occasionally, I reviewed regularly in small, manageable sessions. As a full-time teacher and mom, finding uninterrupted study time wasn’t always easy. I learned to maximize whatever free time I had.
- Building Confidence. The speaking section tends to make many test takers nervous. To overcome this, I practiced speaking aloud whenever possible. The more familiar I became with the tasks, the more confident I felt.
Test Day Experience
When test day finally arrived, I felt a mix of excitement and nervousness. Despite weeks of preparation, there was still that lingering fear of the unknown. Since I wasn’t familiar with the testing location, I left Cavite early and arrived at the venue several hours ahead of schedule. I used the extra time to calm my nerves and do a light review of my notes. About 30 minutes before our scheduled start time, we were allowed into the building for orientation and a rigorous identity verification process. There were around 15 test-takers that day. After the identity checks, we were instructed to store all our belongings in lockers before being assigned individual computers in separate cubicles.

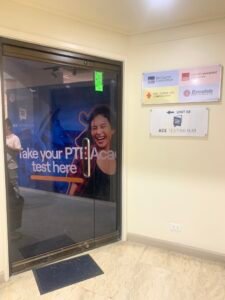
Before the test began, I whispered a prayer, reminded myself to stay calm, trust my preparation, and focus on one question at a time. However, I wasn’t prepared for one particular challenge: the noise. Since all 15 of us started the exam simultaneously, everyone was speaking into their microphones at the same time. The sudden chorus of voices caught me off guard and briefly disrupted my concentration. It was something I hadn’t considered during my practice sessions. Determined not to let the distraction affect my performance, I refocused my attention on my screen and gave the exam my full concentration. The test lasted approximately two hours and fifteen minutes. Before I knew it, it was over.
Then came the hardest part: waiting for the results.
My Results
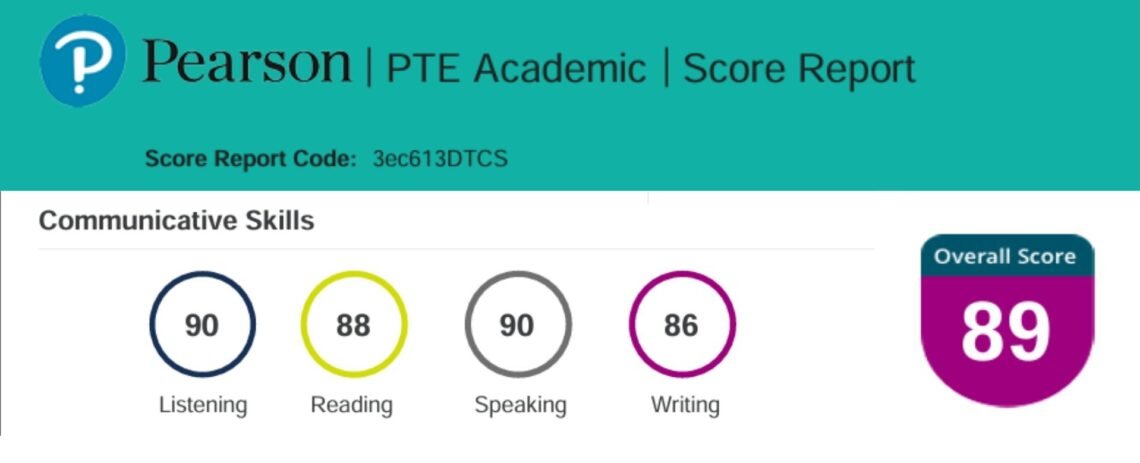
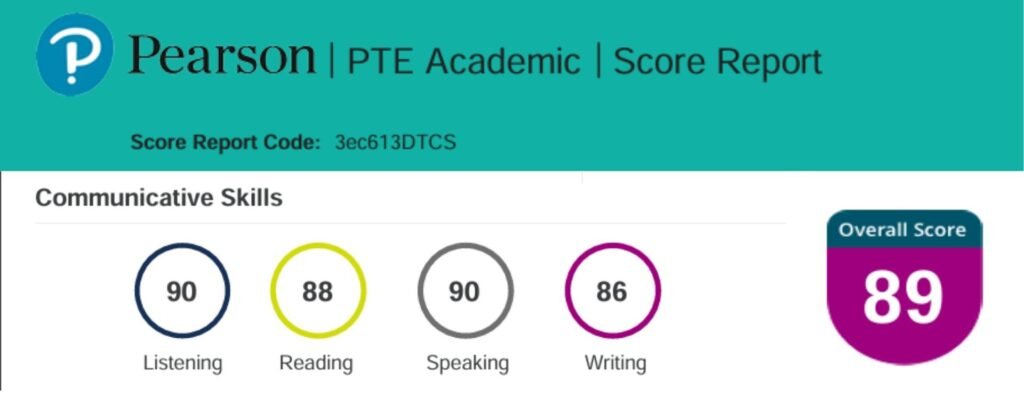
To my surprise and delight, I achieved an overall score of 89 out of 90. Seeing that score felt incredibly rewarding. It wasn’t just a number. It represented the hours of self-study, the sacrifices, and the determination to move one step closer to my dream of teaching in New Zealand. More importantly, it reminded me that I am capable of achieving goals that initially seem intimidating.
PTE Tips and Lesson Learned
Looking back, I realized that success in the PTE Academic is not necessarily about spending thousands of pesos on review programs. While formal coaching can certainly be beneficial, self-study can be just as effective when approached with discipline, consistency, and the right resources.
For anyone planning to take the PTE Academic, here are a few tips and lessons I learned along the way:
- Learn the test format thoroughly. Understanding how each question type is scored can significantly improve your performance.
- Practice consistently. Even short daily study sessions can make a big difference over time.
- Take mock tests regularly. Mock exams help build familiarity with the test environment and identify areas that need improvement.
- Practice with background noise. This is one lesson I wish I had learned earlier. During the actual exam, all test-takers are in the same room and speaking into their microphones simultaneously. Practicing in a quiet room is helpful, but occasionally reviewing with background conversations, music, or ambient noise can help you stay focused despite distractions.
- Believe in your abilities. Confidence plays a huge role in your performance, especially during the speaking section.
- Stay calm on test day. Trust your preparation, focus on one task at a time, and don’t let unexpected challenges throw you off your game.
Most importantly, remember that the PTE Academic is not just a test of your English proficiency. It’s also a test of your preparation, focus, and ability to perform under pressure.
Moving Forward
Passing the English language competency requirement was a one step closer to my New Zealand dream. With my Teaching IQA application completed and my PTE Academic results secured, I was ready to move on to the next stage of the process.
In the next post, I’ll share my experience applying for Teacher Registration with the Teaching Council of Aotearoa New Zealand, including the requirements, documents, and lessons I learned along the way.
For a detailed walkthrough of the registration process, test booking, and how to access your results online, watch the video below.