For quite some time, I’ve been wanting to transform our plain bedroom into a space with more character. Although the walls were newly painted not too long ago, the look felt a bit too plain for me, and I wanted to give the room a softer, more textured feel. After seeing the soft, natural finish of limewash walls, I knew that was the look I wanted to try.
Limewash has this beautiful, cloudy texture that gives walls a soft, natural, chalky finish. Unlike regular paint that aims for a perfectly even coat, limewash actually embraces imperfections. The subtle variations in tone are what make it look organic and timeless.
So when I had the time, I finally decided to go for it. For this DIY project, I used Asvesti Limewash Paint which I bought online. Since limewash is mineral-based and porous, the application process is a little different.
Here are the steps I took in repainting our bedroom with limewash, and what I learned along the way.
Step 1: Prepare the Room
Before starting, move furniture away from the walls and cover it with cloth. Do the same for floors, switches, and sockets to protect them from paint splashes.
Step 2: Prepare the Surface
Make sure the walls are clean and ready for painting. Limewash works best on surfaces that can absorb the paint well like bare plaster or unpainted walls. Remove dust, grease, and any flaking paint. Patch holes or cracks.
Since our bedroom walls were already painted with gloss latex, I topped it with a matte white primer to create a suitable base.
Step 3: Mix the Limewash
Once everything is ready, mix the limewash thoroughly and keep stirring from time to time because limewash tends to settle at the bottom.
The Asvesti limewash paint that I used comes in powder form. I followed the instructions on the label by adding clean water and stirring for 12 minutes until smooth.
Step 4: Apply the Limewash
Applying limewash is different from using a regular paint. Instead of straight up-and-down strokes, apply in crisscross brushing technique using a 4-inch wide brush. This helps create that soft, textured effect that limewash is known for.
The first coat will look patchy and uneven, and that’s completely normal. In fact, that’s part of the charm. As more coats are added, the wall will slowly develop that beautiful layered finish.
One thing I noticed while painting was that the mixture can get thicker as it sits, so remember to stir the paint regularly.
Tip: Avoid going over the same painted area while it’s still wet. I made this mistake, and it can cause the limewash to lift or create uneven patches instead of the soft, natural texture you want.
Step 5: Drying & Second Coats
Let the limewash dry for about 1-2 hours before applying the second coat. It took me about 3 hours to finish the first coat on all four walls of our bedroom. By the time I completed the last wall, the first two were dry, so I applied the second coat immediately.
Tip: If working on a large wall, try painting in smaller sections or “feathering” the edges of still-wet areas as you go. This helps the second coat blend seamlessly.
Step 6: Cure
Limewash needs at least 3 days to cure. Avoid scrubbing or touching the walls during this time. After curing, the finish will look beautifully soft and natural.
Step 7: Apply Top Coat
After 3 days, you can apply a limewash sealer to protect the walls from moisture, dirt, or fingerprints. But if you want to keep the matte, chalky, textured look that limewash is known for, you can skip this step. Just be gentle when cleaning. Use a dry brush or soft cloth.
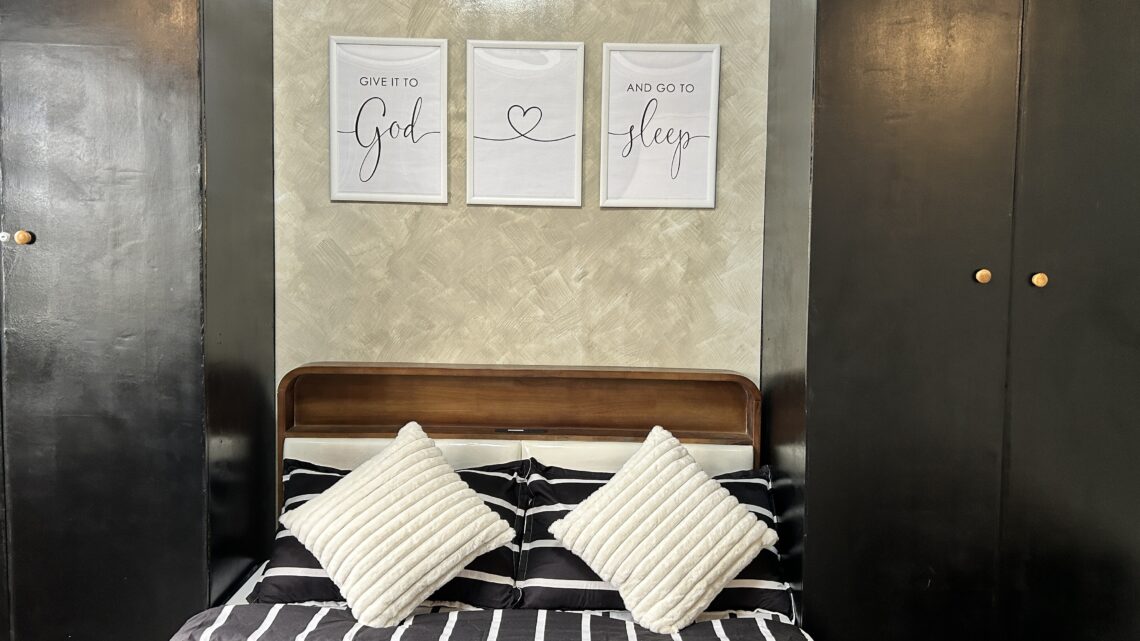
The Final Result
One of the things I appreciate most about limewash is that it doesn’t demand perfection. Unlike traditional paint where every streak can feel like a mistake, limewash welcomes those variations. The little imperfections blend beautifully into the overall texture.
When everything dried, the wall had this soft, matte, almost velvety look that instantly made the room feel warmer and more relaxing. It’s amazing how a simple change in wall finish can transform the whole atmosphere of a space.
Sometimes, giving a room a new look doesn’t require expensive furniture or a major renovation. A simple DIY project can already make a big difference.
Tips:
- Test a small patch first. Limewash always dries lighter and more matte than it looks when wet.
- Wait 1–2 hours before applying the next coat for better results.
- Always stir the mixture before application to maintain consistency.
- Avoid brushing over the same area repeatedly, as this can ruin the texture.
If you’d like to see the step-by-step process and the final result, you can watch the full video here:
I hope this inspires you to try something new in your own space. Sometimes all it takes is a little creativity and a bit of courage to start.